
Keeping your vape tank clean means better flavor and longer-lasting gear. The process is simple: disassemble your tank, rinse everything with warm water, wipe away residue, let it dry completely, and reassemble. Clean weekly or every couple of weeks to prevent buildup and enjoy pure vape flavors without aftertaste.
What Do You Need Before Cleaning Your Vape Tank?

Getting your cleaning supplies together first makes the whole process smoother. You don't need to buy anything special—most of what you need is probably sitting in your kitchen right now.
Basic Cleaning Tools
Warm water is your best friend here. It cuts through most e-liquid residue without any hassle.
- Grab some paper towels or a clean microfiber cloth for drying. A small bowl works great for soaking smaller parts.
- If you've got cotton swabs lying around, they're perfect for getting into tight spots and cleaning threading. That's honestly all you need for regular maintenance.
Deep Cleaning Supplies (Optional)
For those times when your tank needs more than just a rinse, keep some isopropyl alcohol handy—a small amount on a cotton swab is usually enough. A tiny few drops of mild dish soap can help break down stubborn residue, but don't go overboard.
Some folks like using an ultrasonic cleaner if they've got one, though it's definitely not necessary. A soft-bristled toothbrush can help scrub away caked-on gunk without scratching anything.
Drying Materials and Tools
Air-drying is the safest bet, so having a clean towel or drying rack helps. Compressed air cans can speed things up, but skip the heat gun or hair dryer—high heat can warp o-rings and plastic parts. Patience is key here because putting a wet tank back together is asking for trouble.
How Often Should You Clean Your Vape Tank?
The cleaning schedule depends on how much you vape and what you're vaping. Heavy users need to clean more often, while casual vapers can stretch it a bit longer.
Daily Maintenance
If you're vaping daily, just wipe down the outside of your tank and check for any visible residue. Takes a moment. Empty out any leftover e-liquid before bed if you're not planning to use it the next day—old juice gets nasty.

Weekly Regular Cleaning
Once a week, give your vape tank a proper rinse. This keeps flavor pure and stops residue from building up into something gross. If you switch flavors a lot, you might need to do this more often.
Deep Cleaning Schedule
Every couple of weeks to once a month, or whenever you change your coil, do a deep clean. This is when you break out the alcohol and really scrub everything down. It's also a good time to check o-rings and make sure nothing's cracked or worn out. This timing also matches how many drop-in coil tanks are used in real life—for example, Vaporesso iTank runs GTi mesh coils, so a deep clean plus a fresh coil is often the fastest way to “reset” flavor.
Signs You Need to Clean Now
Don't wait for your scheduled cleaning if you notice a burnt taste, reduced vapor production, or leaking. If your vape flavors taste muddy or you're getting flavor from your last e-liquid mixing with the new one, clean that tank immediately. Dark-colored residue visible through the glass means you're overdue.
How to Clean Your Vape Tank: Step-by-Step Process
Here's where we get into the actual work. Take your time with this—rushing leads to stripped threads or lost o-rings.
Safe Disassembly
- First things first: empty any remaining e-liquid back into its bottle or toss it.
- Unscrew your tank from the battery or mod—never clean it while attached. Take the tank apart piece by piece, laying everything out in order so you remember how it goes back together.
- Remove the coil and set it aside (replaceable coil heads are typically swapped out; rebuildable coils on RTAs/RDAs are a different case).
- Keep track of all those tiny o-rings because losing one means your tank will leak like crazy.
Initial Rinse and Cleaning
- Run all the parts under warm water—not hot, just comfortably warm.
- Let the water flow through the airflow holes and chimney to flush out loose residue. Use your fingers to gently rub away any visible gunk. For the glass section, warm water usually does the trick.
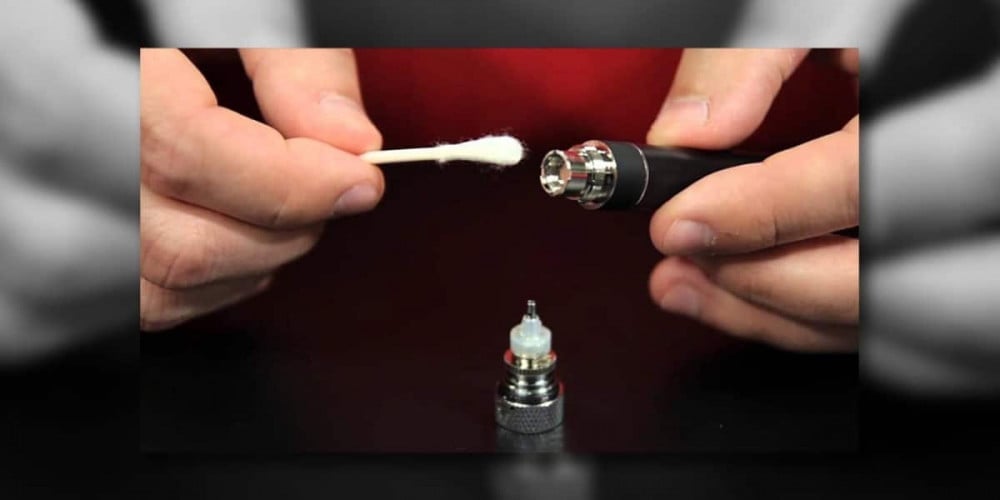
- Cotton swabs work great for cleaning threading and hard-to-reach corners.
Dealing with Stubborn Residue
- If water alone isn't cutting it, fill your bowl with warm water and add a few drops of dish soap. Let the parts soak for a few minutes.
- For really stubborn buildup, dip a cotton swab in isopropyl alcohol and scrub the problem areas. The alcohol breaks down sticky residue that water can't touch. Just make sure you rinse everything thoroughly afterward—you don't want to vape soapy or alcohol-flavored clouds.
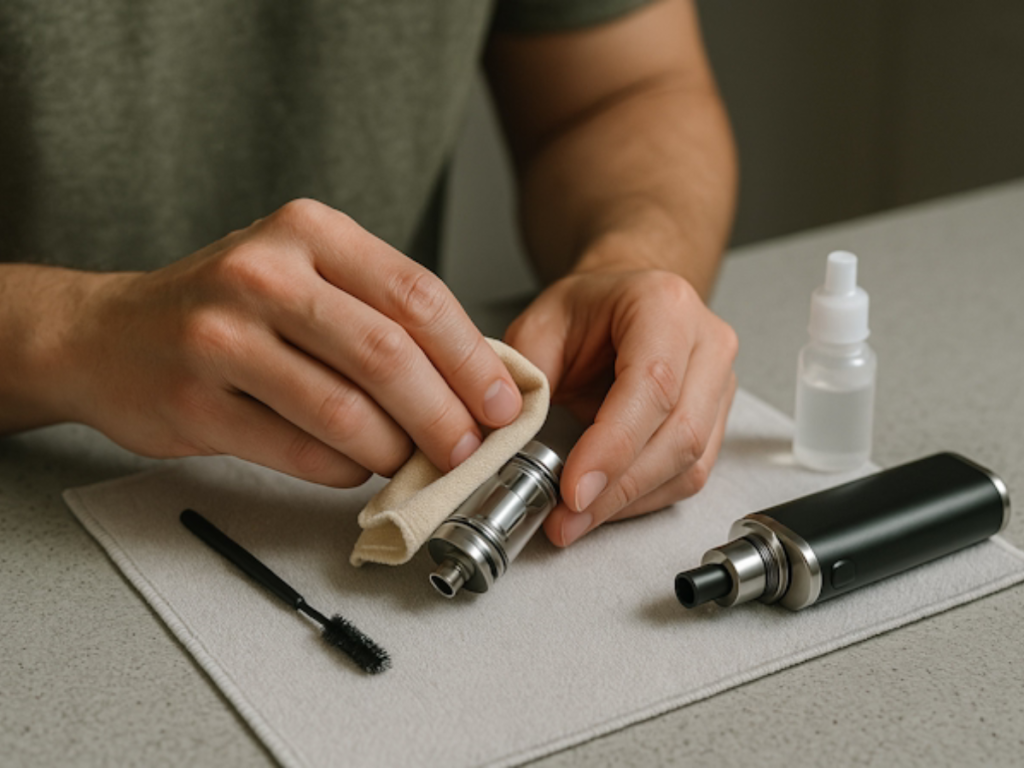
Proper Drying Methods
- Shake off excess water and lay everything out on a clean towel.
- Let it air-dry until completely dry.
- Check all the nooks and crannies to make sure there's no hidden moisture.
- O-rings need to be completely dry, or you’re more likely to get leaks, trapped water, or gurgling. If you’re in a hurry, compressed air can help—just use it gently.
Correct Reassembly
- Once everything's bone dry, put it back together in reverse order.
- Don't overtighten anything—hand-tight is enough. Make sure o-rings are seated properly before screwing parts together.
- Install a fresh coil or a clean existing one, prime it properly, and you're good to go.
How Should You Clean When Switching Vape Flavors?

Changing from vanilla custard to menthol without cleaning? You're gonna have a bad time. Flavor ghosting is real, and it ruins the experience.
Flavor Contamination
Even small amounts of leftover e-liquid can completely change how your new flavor tastes. Sweet flavors are especially persistent—they stick around and make everything taste sugary. Dark-colored juices leave more residue than clear ones, so switching from dessert flavors to fruit requires extra attention.
Cleaning Requirements for Flavor Changes
At a minimum, rinse your tank thoroughly with warm water when switching between similar flavors. For drastically different flavors—like going from coffee to strawberry—do a full clean with soap and water. Some people keep multiple tanks just for different flavor profiles to avoid this hassle entirely.
Best Practices
If possible, use up most of your e-liquid before switching rather than dumping half a tank. Clean your tank while you've still got the old coil in, then swap to a fresh coil for the new flavor. This gives you the cleanest taste possible. Wait until your tank is completely dry before adding new e-liquid, or you'll dilute the flavor.
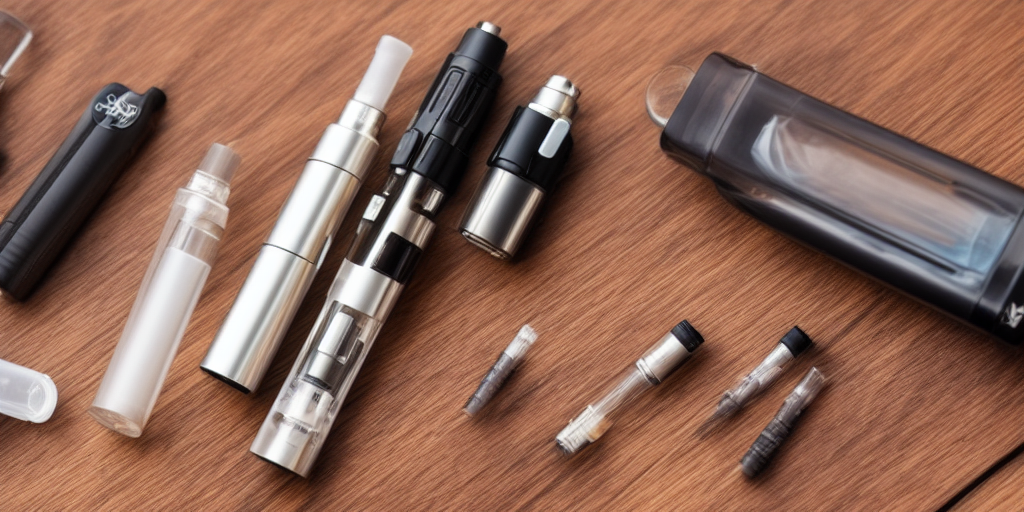
What's the Best Way to Clean Different Types of Vape Tanks?
Not all vape tanks are created equal, and cleaning methods vary a bit depending on what you've got.
Sub-Ohm Tanks
These workhorses handle high-wattage vaping and burn through juice fast. They tend to get gunked up quicker because of the higher temperatures.
The good news is that most sub-ohm tanks come apart easily. Pay special attention to the airflow control ring—it catches a lot of residue. The wider bore means they're generally easier to clean than smaller tanks.
RTA and RDA Maintenance
Rebuildable tanks need more frequent attention because you're reusing the coils. You can dry-burn your coils to clean them between re-wicking (carefully, and never with nickel or titanium wire). The build deck needs regular scrubbing since residue builds up around the post holes. These tanks have more parts, so keep track of everything during disassembly.
Pod Systems
Many pod systems use disposable pods, so you can't really clean them—just toss and replace. For refillable pods, you're limited in what you can do since most don't fully disassemble. Rinse what you can access and replace the pod when the flavor starts going south. They're cheap enough that deep cleaning isn't worth the effort.
If “less mess between cleanings” is the goal, devices like the Vaporesso ECO One Pro use a top-fill design that refills without removing the pod, which helps cut down spills and sticky buildup around the pod area.
Material Considerations
- Glass tanks can handle alcohol and soap without issue.
- Plastic tanks need gentler treatment—stick to warm water and avoid alcohol, which can cloud or crack some plastics.
- Stainless steel parts are pretty bulletproof, but don't soak them overnight, or they might develop water spots. Check your manual if you're unsure about materials.
3 FAQs about Vape Tank Maintenance
Q1. Can You Clean a Vape Tank With Just Water, or Do You Need Special Cleaners?
Warm water works for regular maintenance. Rinse the tank inside and out until the water runs mostly clear and any strong leftover smell noticeably fades, and you’ve removed most residue. For stubborn buildup from sweet or dark e-liquids, add a few drops of mild dish soap to warm water, then rinse thoroughly. For the toughest gunk, use a small amount of isopropyl alcohol on a cotton swab and rinse several times. Expensive “special” vape cleaners usually aren’t necessary.
Q2. How Do You Know When to Replace Your Vape Tank Instead of Cleaning It?
Replace your tank if it persists in leaking despite cleaning, has cracked glass, stripped threading, or corroded metal parts. If o-rings are shot or airflow won't stay adjusted, it's time. However, try replacing just the damaged parts first—glass sections and o-ring kits are cheap. If you're constantly fighting leaks or getting off flavors even with fresh coils and cleaning, invest in a new tank.
Q3. Is It Safe to Clean a Vape Tank in the Dishwasher?
No. Dishwasher heat can damage o-rings and warp plastic components, and it can also cause some glass to turn cloudy or look dulled over time. Dishwasher detergents can leave residue you don’t want to inhale, and small parts can get lost. Hand-cleaning takes only a few minutes and protects your gear. If you want automated cleaning, ultrasonic cleaners are gentler for small items, but hand-washing is still the safest option.
Conclusion
Your vape tank works hard, so give it the care it deserves. A quick weekly rinse keeps your best vape tank performing like new and your vape flavors tasting exactly how they should. Set a reminder on your phone, make it part of your routine, and you'll never deal with burnt hits or mystery flavors again. Clean your vape tank today—your taste buds will thank you.
If you’re also shopping for a setup that stays cleaner between rinses, Vaporesso’s options like LUXE XR MAX 2 (compatible with GTX coils and precise airflow adjustment) or ECO One Pro (top-fill refills without pulling the pod) are straightforward picks, depending on whether you prefer a pod mod or a pen-style pod.


