
Getting a burnt taste from a brand-new coil? You probably skipped the priming step. Priming means soaking your coil's cotton with e-liquid before you start vaping. It's simple, takes just a few minutes, and saves you from that awful burnt flavor. Let's walk through exactly how to do it right.

What Is a Vape Coil and Why Does Priming Matter?
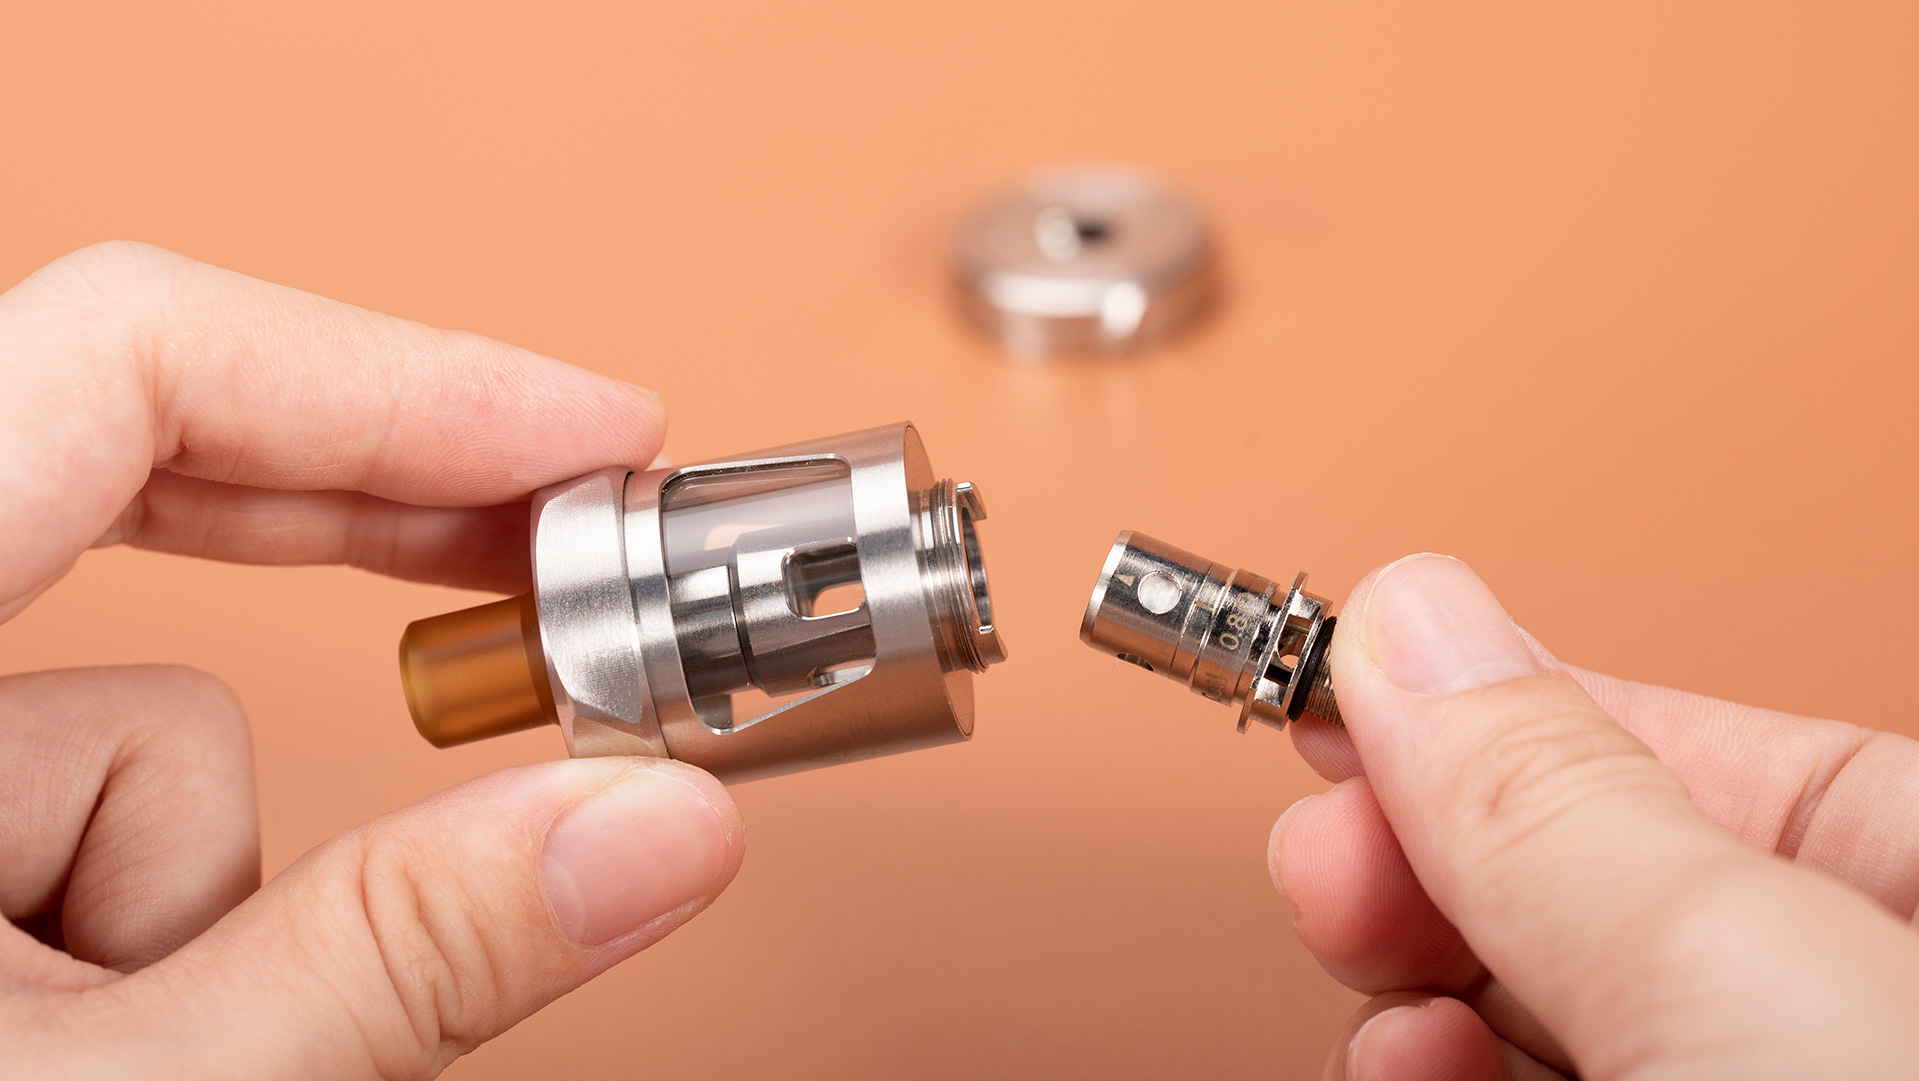
Before we get into the how-to, you need to understand what you're working with. A vape coil is basically the heart of your device—it's the part that heats up your e-liquid and turns it into vapor.

The Basic Parts of a Coil
Every coil has two main components: metal wire (usually Kanthal or stainless steel) and cotton wicking material. The wire wraps around the cotton, and when electricity flows through it, the wire heats up. The cotton holds your e-liquid and feeds it to the hot wire, creating vapor.
How the Wicking System Works
Think of the cotton like a sponge. When it's dry, it burns easily. When it's soaked with liquid, it can handle the heat without any problems. That's why priming matters so much—you're making sure that sponge is fully wet before you fire up your device.
Different Types of Coils
You'll find coils in different resistance levels, usually marked in ohms. Sub-ohm coils (below 1.0Ω) produce more vapor and need more liquid. Higher resistance coils (above 1.0Ω) use less power and work well for mouth-to-lung vaping. Both types need proper priming, though sub-ohm coils often need a bit more attention since they run hotter.
What Happens If You Skip Priming
Here's the deal: if you fire up a dry coil, the cotton burns instantly. Once that happens, the damage is done. You'll taste burnt cotton every time you vape, and you'll need to replace the coil. That's wasted money and a terrible experience you could've avoided with just a few extra minutes of prep work.
How to Prime a Vape Coil: The Right Way
Now for the main event. Priming isn't complicated, but you need to be patient and thorough. Rush through it, and you'll regret it.
The Manual Dripping Method
Start by looking at your new coil. You'll see white cotton through the wicking holes on the sides. Take your e-liquid bottle and carefully drop a few drops directly onto the cotton through each visible wicking port. Do the same for the top opening where you can see cotton. The goal is to see the cotton change color as it absorbs the liquid—it should look darker and more saturated, not white and fluffy.
How Long to Let It Sit
After you've manually saturated the cotton, screw the coil into your tank and fill it with e-liquid. Then here's the hardest part: wait. Let your device sit for at least 5–10 minutes. This gives the liquid time to fully soak through all the cotton, including the parts you can't see inside the coil. If you're using a high-VG liquid (thicker), wait a bit longer instead.

Breaking In Your New Coil
Once the waiting period is over, don't just crank your device to full power. Start at the lower end of your coil's recommended wattage range (check the side of the coil—it'll have a range printed there). Take a couple of short puffs without firing the device (called "primer puffs"). This creates suction that pulls more liquid into the cotton. Then start vaping at low power and gradually increase the wattage over your first tank of liquid.
Getting the Power Settings Right
Most devices today support an auto mode, and it’s a solid default if you’re new and not sure where to set wattage. Turn on auto mode, install the coil, and let the device read the resistance (ohms). Once it detects the coil, it will automatically adjust to a suitable power level for that build. You can vape there for a bit and only switch to manual later if you want finer control, but auto mode helps avoid going too high too fast and scorching the cotton.
How Long Do Vape Coils Last?
You've primed your coil perfectly, but nothing lasts forever. Let's talk realistic expectations.
Typical Lifespan Ranges
Most coils last about a week as a general rule of thumb, but your actual lifespan depends heavily on your setup and habits—lighter-use vapers can often stretch beyond that. There's no magic number, but if you're getting less than a week, something's wrong with either your technique or your setup.
What Affects How Long Coils Last
Your vaping habits make the biggest difference. Chain vaping (taking puff after puff without breaks) doesn't give the cotton time to re-saturate, leading to dry hits that shorten coil life. The wattage you use matters too—higher power means faster wear. How often you vape obviously plays a role as well.
E-Liquid Ingredients and Coil Life
Here's something many vapers don't realize: sweet e-liquids kill coils faster. Those dessert and candy flavors you love? They contain sweeteners that caramelize on your coil, creating a gunk that clogs the cotton and reduces performance. High-VG liquids are thicker and can struggle to wick properly in some coils, also shortening lifespan.
Your Usage Patterns
If you're a heavy vaper going through multiple tanks daily, expect to change coils more often than someone who vapes occasionally. That's just how it works. Keep an eye on flavor quality—when your vape starts tasting muted or slightly off, that's your warning sign that the coil is on its way out.
Common Mistakes When Priming a Vape Coil

Even experienced vapers mess this up sometimes. Here are the traps to avoid.
Rushing the Process
The number one mistake? Impatience. You drip some liquid on the coil, fill the tank, and immediately start vaping at full power. That's a one-way ticket to burnt cotton city. The liquid needs time to saturate completely. Those 5-10 minutes of waiting aren't optional—they're essential.
Over-Saturating Your Coil
Yes, you can use too much liquid when priming. If you flood the coil, you'll get gurgling, spitting, and leaking. You want the cotton saturated but not drowning. If liquid is pooling in your tank or you're getting e-liquid in your mouth, you overdid it. A few drops per wicking hole is enough.
Ignoring the Instructions
Every coil is different. Some need more priming than others. That piece of paper in the coil box or the markings on the coil itself? Read them. The manufacturer tested their product and knows what works best. If they say to prime it a certain way or use a specific wattage range, there's a good reason.
Starting at Maximum Power
Your coil's wattage range has a maximum for a reason, but that doesn't mean you should start there. Beginning at high wattage on a fresh coil is like flooring the gas pedal in a cold engine. Start low, break in the coil gradually, and work your way up. Your coils will last longer and taste better.
FAQ
Q1. Can I Reuse a Burnt Coil if I Clean It?
No, once a coil is burnt, the damage to the cotton is permanent. You might be able to rinse off some gunk and get a few more puffs, but that burnt taste will remain. Some people try soaking coils in vodka or distilled water to extend their life, but this only works for coils that are gunked up but not actually burnt. If you're tasting burnt cotton, it's time for a replacement. Trying to salvage a burnt coil will just give you a bad experience and isn't worth the frustration.
Q2. Why Does My Coil Burn Out Faster With Certain Flavors?
Sweet and dessert flavors contain artificial sweeteners like sucralose that caramelize when heated. This creates a dark, sticky residue on your coil that clogs the wicking ports and reduces the cotton's ability to absorb liquid. Flavors like custards, donuts, and candy will always kill coils faster than fruit or menthol flavors. If you love sweet liquids, accept that you'll change coils more frequently, or alternate between sweet and non-sweet flavors to give your coils a break.
Q3. Should I Prime Pre-Filled Pod System Coils?
Pre-filled pods and some pod systems don't require manual priming because they're already sealed with liquid during manufacturing. However, refillable pod coils still benefit from the same priming process as regular coils. After installing a new pod coil, let it sit for 5-10 minutes before vaping, and start at lower power settings. The waiting period helps ensure the cotton is fully saturated, even though you can't manually drip liquid onto it like you can with traditional coils.
Conclusion
Priming your vape coil takes just a few extra minutes but makes all the difference. Drip liquid on the cotton, wait 5-10 minutes, and start at low power—that's really all there is to it. Skip these steps, and you'll waste money on burnt coils and hate every puff. Do it right, and you'll get better flavor, longer coil life, and a much better vaping experience.
Ready to try it? Grab your next coil and give it the proper start it deserves. If you’re restocking coils or pods, Vaporesso makes it easy to match the right resistance to your device—and then prime it the same careful way before your first puff. Browse Vaporesso coils and pods, pick your resistance, and start low on wattage for the smoothest break-in.


